
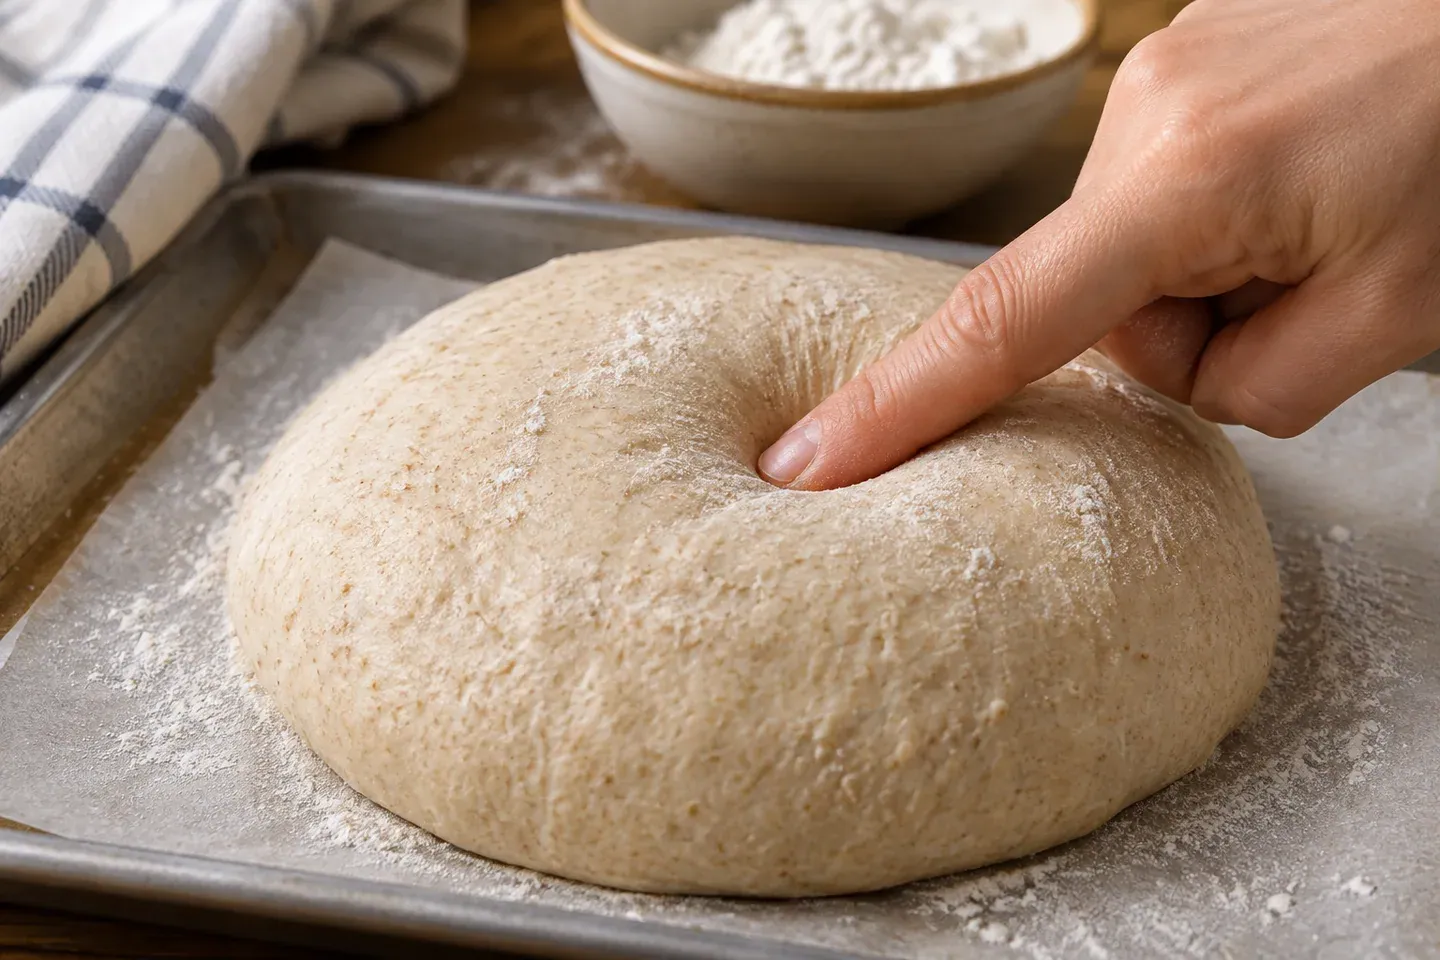
To tell when bread dough is fully proofed, look for a shaped loaf that has expanded, feels aerated, and retains some resilience when touched gently. A slow, partial return from a light fingertip impression can support that decision. It should not replace the loaf's overall appearance, the recipe's target, or awareness of the dough's temperature.
Final proofing happens after shaping. It is different from deciding when the first rise has finished, and it is not simply a requirement for every loaf to double again. This guide helps you combine visual and tactile clues so that one misleading poke or an unfamiliar pan does not make the entire decision.
Establish what the shaped dough looked like
Before covering the pan or basket, notice the dough's starting shape. Is it a compact log, a relaxed round, or a tray of tightly rounded rolls? Without that reference, it is easy to mistake the shape relaxing outward for the expansion that fermentation is meant to produce.
Take a quick photograph or note the height in the pan if useful. Do not compare your loaf only with an online image made in different cookware. Pan dimensions, side angles, and dough weight affect how tall the same amount of expansion appears.
A shaped dough begins with tension from handling. As it ferments and relaxes, the outside often looks fuller and less tightly drawn. That transition is informative, but it needs to be interpreted with volume and the dough's feel. A relaxed surface alone does not prove that enough gas has developed.
Look at the entire loaf before touching it
Watch for an increase in fullness across the whole shape, not just one bubble near the top. A pan loaf may fill its corners more comfortably. Rolls may become plumper and move closer to their neighbors. A round may look less compact while still holding a recognizable supported shape.
Small bubbles can indicate activity, but their absence on the surface does not automatically mean the interior is inactive. Flour dusting, dough hydration, enrichment, and the shape's skin can hide them. Avoid scraping the surface repeatedly to search for a particular appearance.
Consider whether the loaf looks stable. A very fragile surface, a dough that has visibly risen and begun to sink, or collapse from a slight disturbance suggests a different problem from a loaf that still looks tightly wound. More waiting is not necessarily the right response to every low-looking dough.
If the recipe gives a pan-height target, use it as one reference alongside the other clues. A target developed for one pan does not transfer precisely to a wider or deeper pan. The same dough weight can produce different visual heights without a change in fermentation quality.
Perform one gentle fingertip check
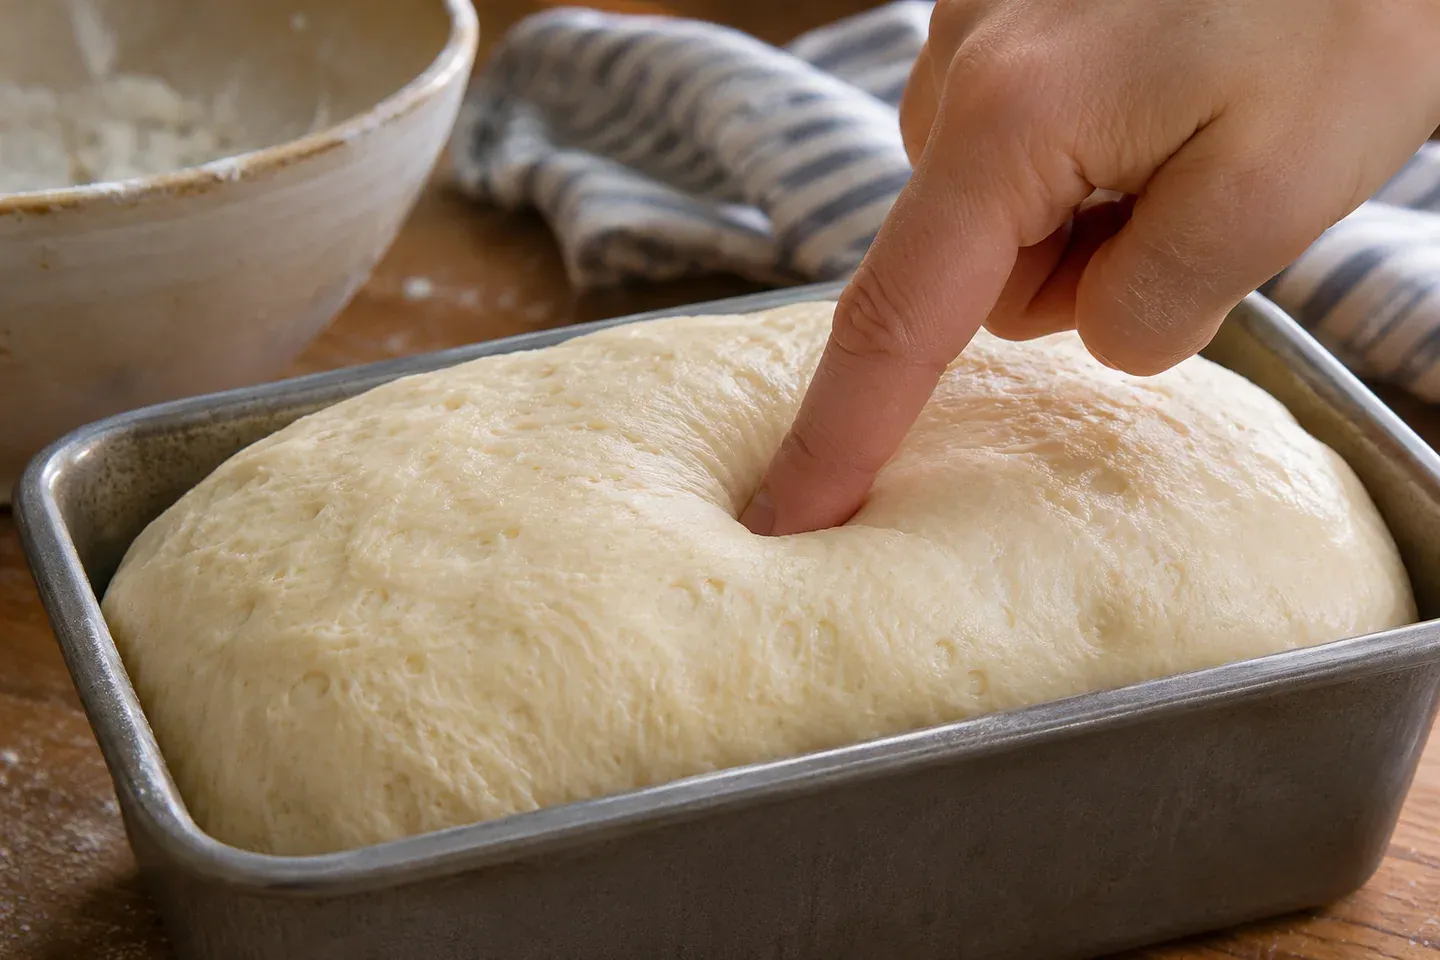
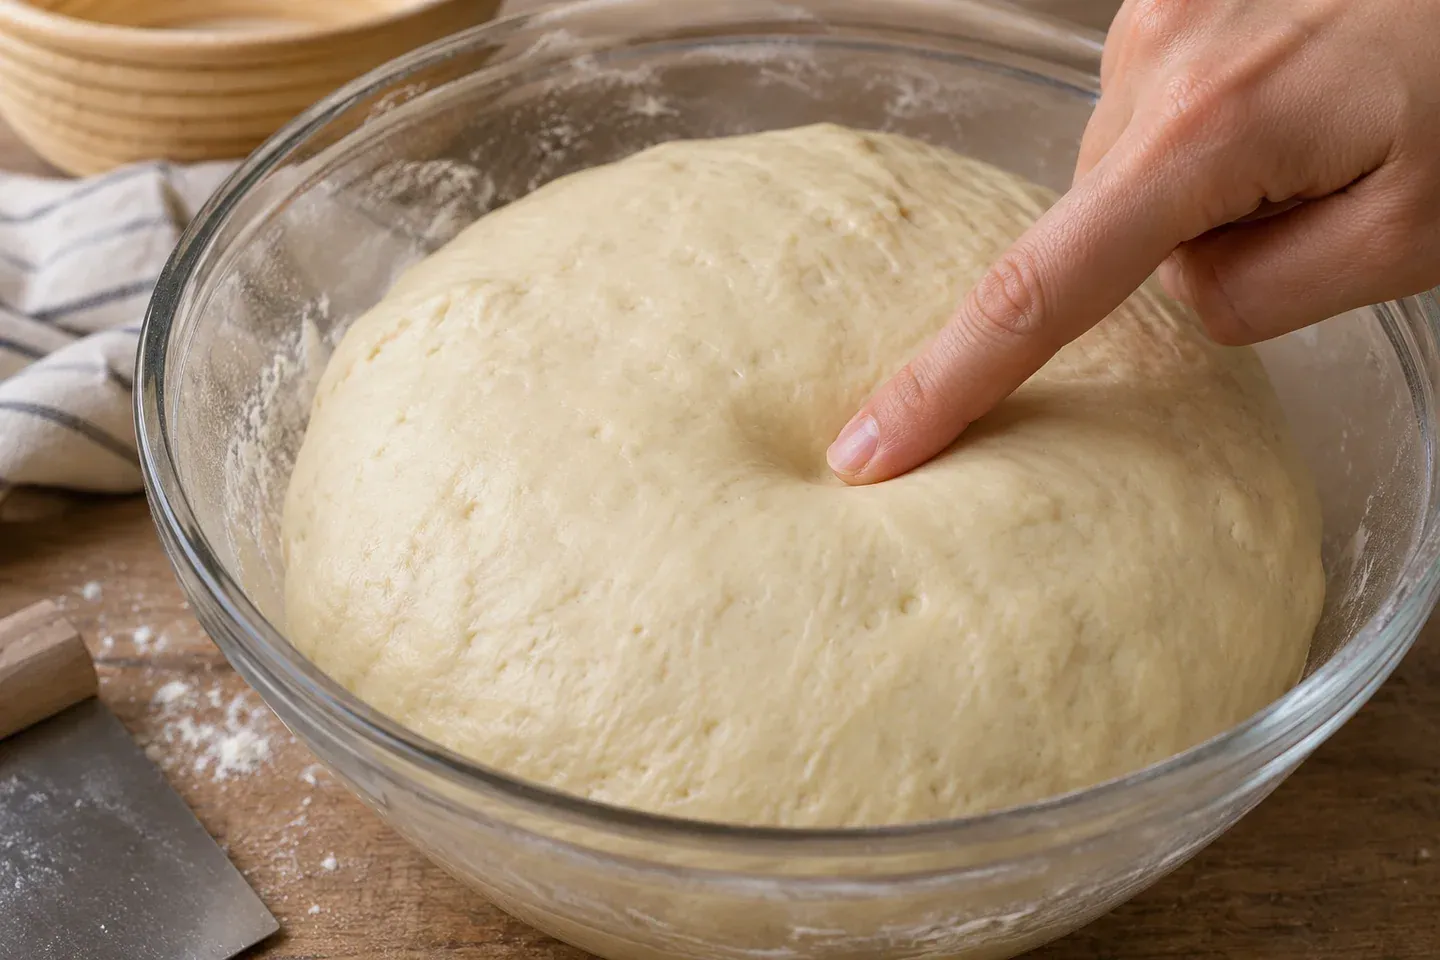
Use a light touch on a small area of the dough rather than pressing deeply into the center of the loaf. The aim is to observe resilience without deliberately removing a large amount of gas. Keep the motion controlled and avoid tearing the surface.
A fingertip can stick to a moist dough and pull it outward when lifted. Lightly flouring the finger may help in some methods, but excess flour can obscure the response. If the dough is very wet, a different observation method may be more useful than repeatedly trying to make a perfect indentation.
Notice how the impression changes over several moments. A rapid, strong return can suggest the dough still has considerable tension. A slower, partial return may support readiness when the loaf also looks aerated. An impression that remains alongside obvious fragility can point toward excessive proofing.
These are interpretations, not universal rules. A cold loaf can resist pressure differently from a warm one. A stiff dough and a very soft dough also respond differently. Use the check to add information rather than allowing it to overrule everything else you observed.
Combine the signs into a decision
First, ask whether there has been meaningful expansion since shaping. Second, ask whether the dough looks and feels lighter rather than simply stretched. Third, assess whether it retains enough structure to be transferred and baked without collapsing at a slight touch.
When all three observations align with the recipe's instructions, a gentle indentation can provide another useful confirmation. When they disagree, investigate the disagreement. A dough that springs back quickly but has been refrigerated may not mean the same thing as a warm, newly shaped log with no visible expansion.
Avoid repeating the poke test over and over in the same spot. Each press changes that area and can make later observations less meaningful. A few light, well-considered checks are preferable to covering the loaf in dents while waiting for one to behave exactly as expected.
For your first attempts, write down the decision and compare it with the cooled loaf afterward. That feedback is how an observation becomes useful experience. A finger impression by itself cannot guarantee a particular crumb or amount of oven spring.
Recognize likely underproofing
An underproofed shaped loaf often remains relatively compact and feels dense. Its surface may retain strong tension from shaping. When baked, it can expand abruptly, split at weak points, or develop an uneven structure. Those outcomes are possible clues, not proof that every split loaf was underproofed.
Before deciding it merely needs more time, confirm that fermentation is occurring. Inactive yeast or an unreliable starter is a different issue from a healthy dough progressing slowly in a cool room. The rising-time guide helps organize that distinction.
If the dough is developing steadily and remains within the recipe's intended method, continued observation may be appropriate. Do not force rapid expansion with extreme heat. A warm outside and cooler center can add unevenness rather than resolving the underlying schedule.
On the next bake, note how much fuller the dough became before entering the oven. Comparing that observation with the finished crumb is more informative than changing the yeast quantity automatically. Keep the rest of the formula consistent while learning the final-proof cues.
Recognize likely overproofing
An overproofed loaf may become fragile, lose height, or collapse under a light touch. Its structure has been stretched beyond the useful stage for that method. A dough that has already risen and fallen should not be judged as though it has simply failed to rise yet.
Do not expect an extra-deep score to create strength that the dough no longer has. Scoring directs expansion where sufficient structure and gas remain; it does not reverse every consequence of excessive fermentation. Handle a fragile loaf with particular care and avoid unnecessary manipulation.
Whether reshaping is useful depends on the dough and recipe. A simple commercial-yeast dough may respond differently from a mature sourdough that has weakened over a long period. This guide does not provide a universal rescue procedure for all overproofed doughs.
Use the experience to adjust the next schedule. Check earlier, preheat sooner, or review the starting dough temperature. Increasing flour or reducing water without evidence changes a different part of the process and may not address why the proof went too far.
Account for the loaf's specific style
Pan loaves have side support, so their shape can look more stable than an unsupported round at a similar stage. Use the pan's visual references while remembering that dough quantity matters. A small dough in a large pan is not necessarily underproofed because it never reaches the rim.
Rolls offer repeated units to observe. Their spacing and individual portion weights affect whether they touch at the end of proofing. A single oversized roll can look ready before smaller neighbors, so even dividing helps both observation and baking consistency.
Whole wheat, enriched, stiff, and very wet doughs each bring different surface and handling characteristics. Do not require all of them to reproduce one white-flour demonstration. Learn the intended cues within a specific recipe before making extensive substitutions.
Cold-proofed dough deserves its own method. It may enter the oven directly from refrigeration in a recipe designed for that process. Do not add an arbitrary long room-temperature wait simply because a cold fingertip impression looks different from a warm demonstration.
Learn from the cooled loaf
Allow the bread to cool before examining its crumb. Early slicing can compress the interior and confuse the diagnosis. Note whether dense areas, large tunnels, weak sides, or irregular expansion appear, then compare those features with your proofing observations.
Proofing is not the only cause of crumb problems. Measuring, dough development, shaping, and baking also matter. The dense bread guide helps you avoid assigning every disappointing result to the final rise.
Keep the next change narrow. You might let the same dough become slightly fuller before baking or check it earlier in a warmer room. One deliberate adjustment makes the result easier to interpret than changing flour, starter quantity, pan size, and proofing time together.
Proofing questions
Is the poke test reliable for every dough?
No. It is one useful observation, affected by temperature, consistency, surface condition, and handling. Combine it with expansion and the recipe's target. If the test damages a very delicate dough, use less intrusive observations instead of repeating it forcefully.
Should a proofed loaf feel completely slack?
No. Readiness requires useful aeration while enough structure remains for baking. Complete slackness or collapse is not a general goal. The expected balance depends on the recipe, which is why one visual demonstration should not become a rule for every bread.
When should I switch on the oven?
Before the final proof is finished. Once you recognize the stage just before readiness, use it to plan preheating on later bakes. Waiting for a fully ready loaf before beginning a long preheat can make an otherwise sensible proofing decision arrive too late.