
Learning how to knead bread dough starts with recognizing a change, rather than counting a fixed number of pushes. A rough mixture gradually becomes more cohesive, stretches farther before tearing, and holds its shape more willingly. Those changes tell you more than whether you have worked for exactly eight minutes.
Hand kneading is a useful way to notice that development because you feel the dough throughout the process. The method below suits an ordinary wheat bread dough. Very wet dough, rich brioche, and dough made largely from rye need different handling. Choose the technique for the dough in front of you instead of assuming that every bread must become a perfectly smooth, nonsticky ball.
What kneading changes inside the dough
When wheat flour meets water, its proteins begin forming the network that bakers call gluten. Mixing distributes the ingredients; kneading and resting help the dough develop a connected structure. That structure needs enough strength to hold fermentation gases while retaining enough flexibility to expand.
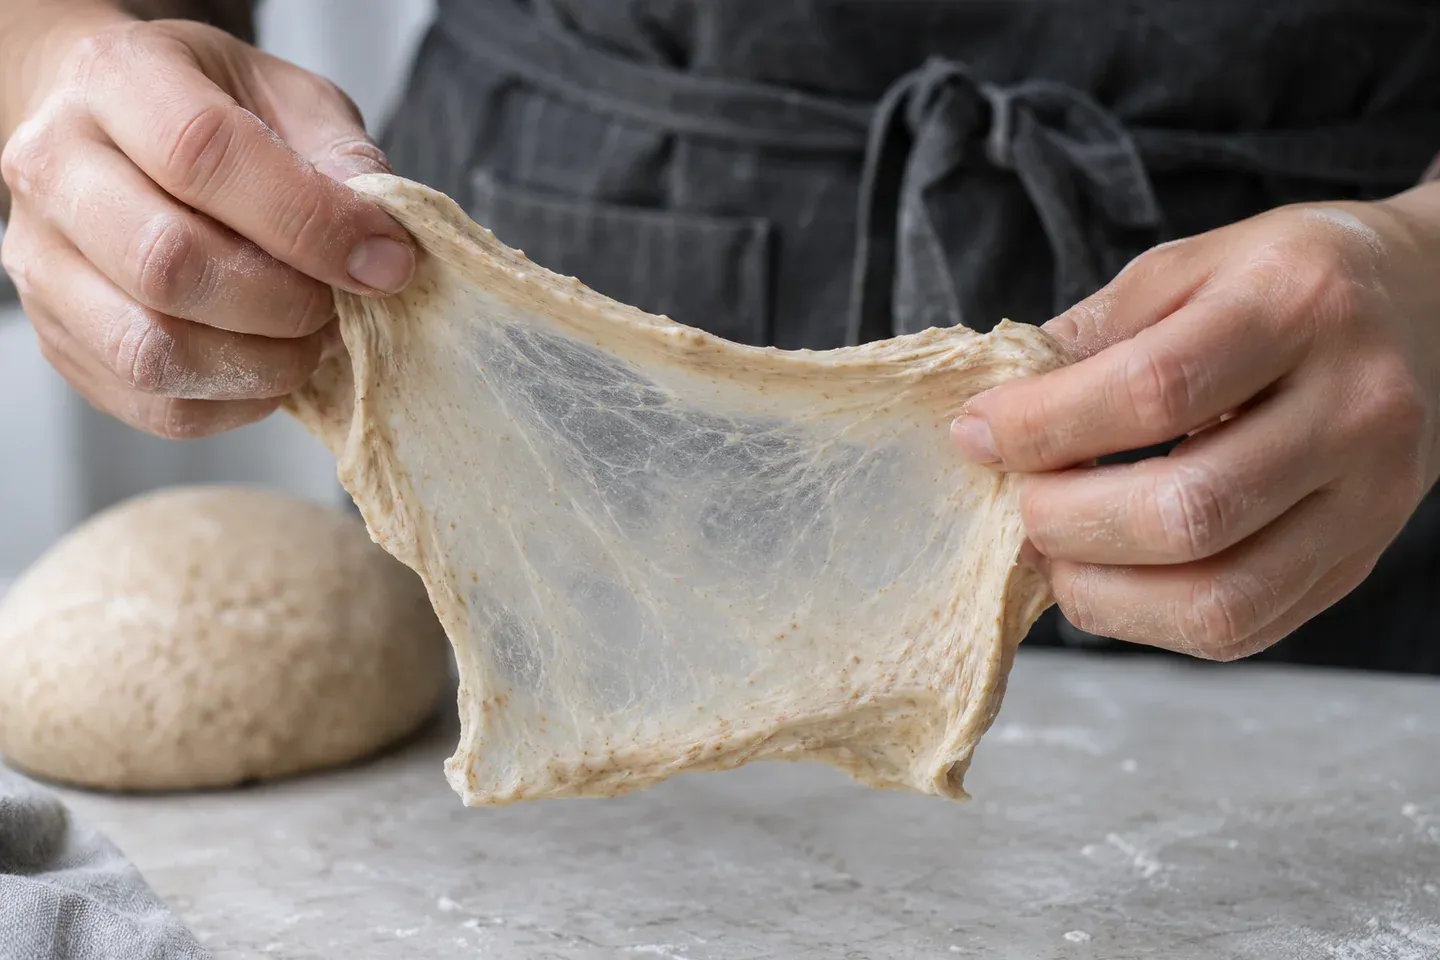
Think about a thin piece of dough stretched between your fingers. If it breaks immediately into rough fragments, the structure may not yet be sufficiently developed or hydrated. If it stretches into a more continuous sheet, the dough is better organized. This is a practical observation, not a laboratory measurement of its final baking potential.
Strength and stiffness are different. A dough can feel very firm because it contains too much flour while still tearing easily. Adding more flour to make it easier to handle does not necessarily improve its gluten development. Our flour comparison explains why different wheat flours can also respond differently to the same water quantity.
Check the mixture before you start
First mix until you can no longer see separate dry pockets. Scrape the bowl's base and sides rather than leaving flour behind and judging only the wetter portion. Cover the rough dough for about ten minutes if your recipe permits. Even a short rest can change how evenly hydrated and manageable it feels.
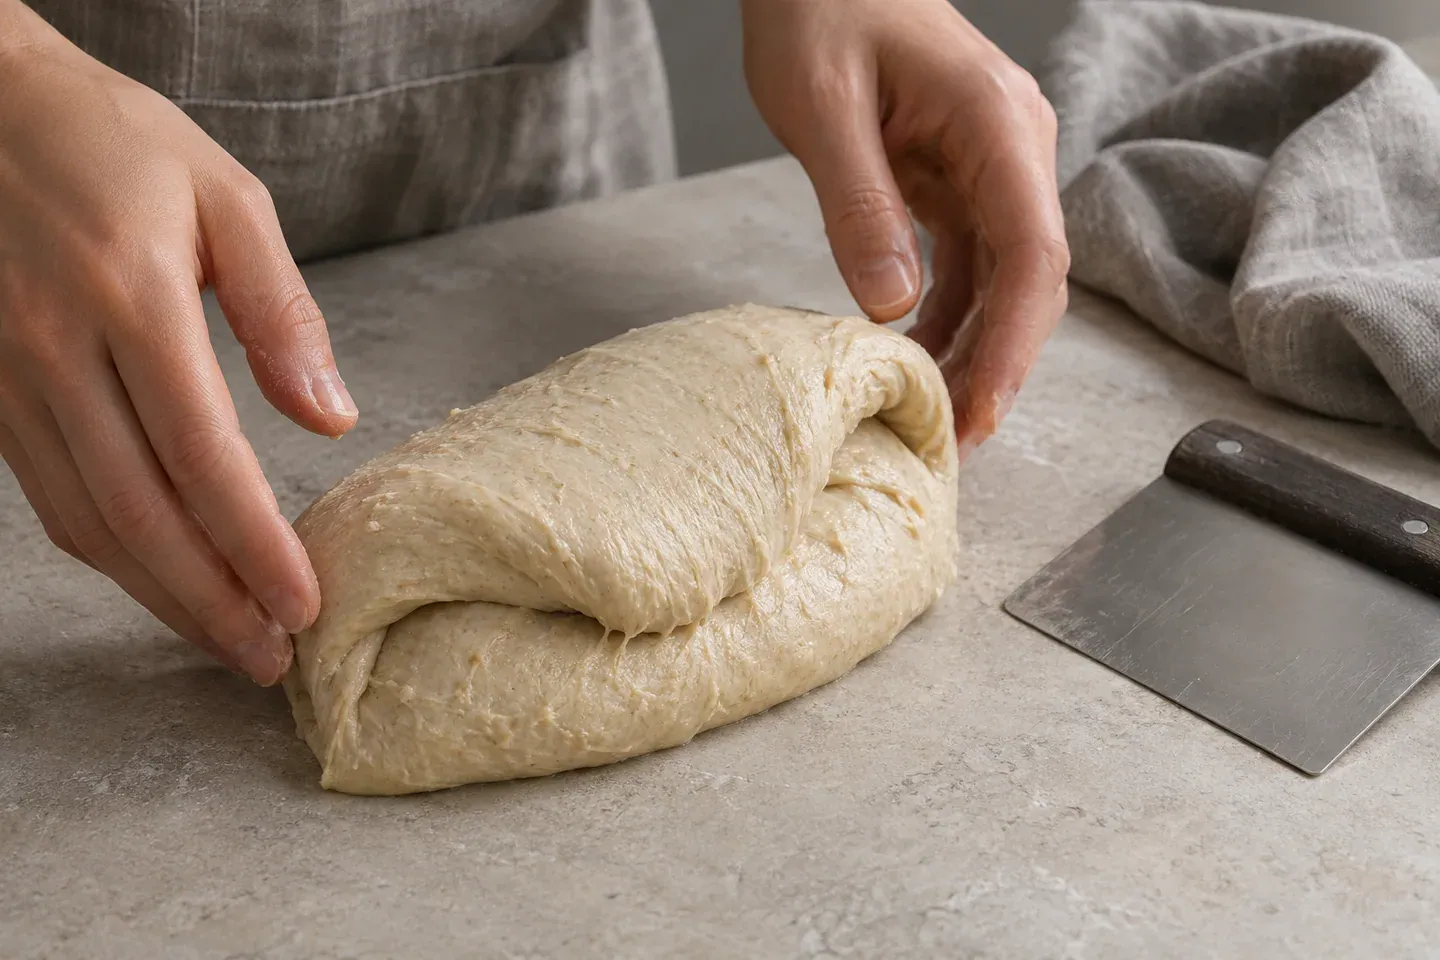
Clear a stable section of countertop. Remove sharp tools and ingredients you will not need. A bench scraper is particularly helpful because it lets you lift sticky dough without dusting every surface heavily. Keep a little flour nearby, but regard it as a handling aid rather than an ingredient to add without limits.
Take rings off before handling dough, wash your hands, and use a clean work surface. Raw flour can carry harmful germs, so do not taste the dough during the process. The FDA's flour guidance also recommends cleaning the utensils and surfaces that contact uncooked flour mixtures.
Use a push, fold, and turn rhythm
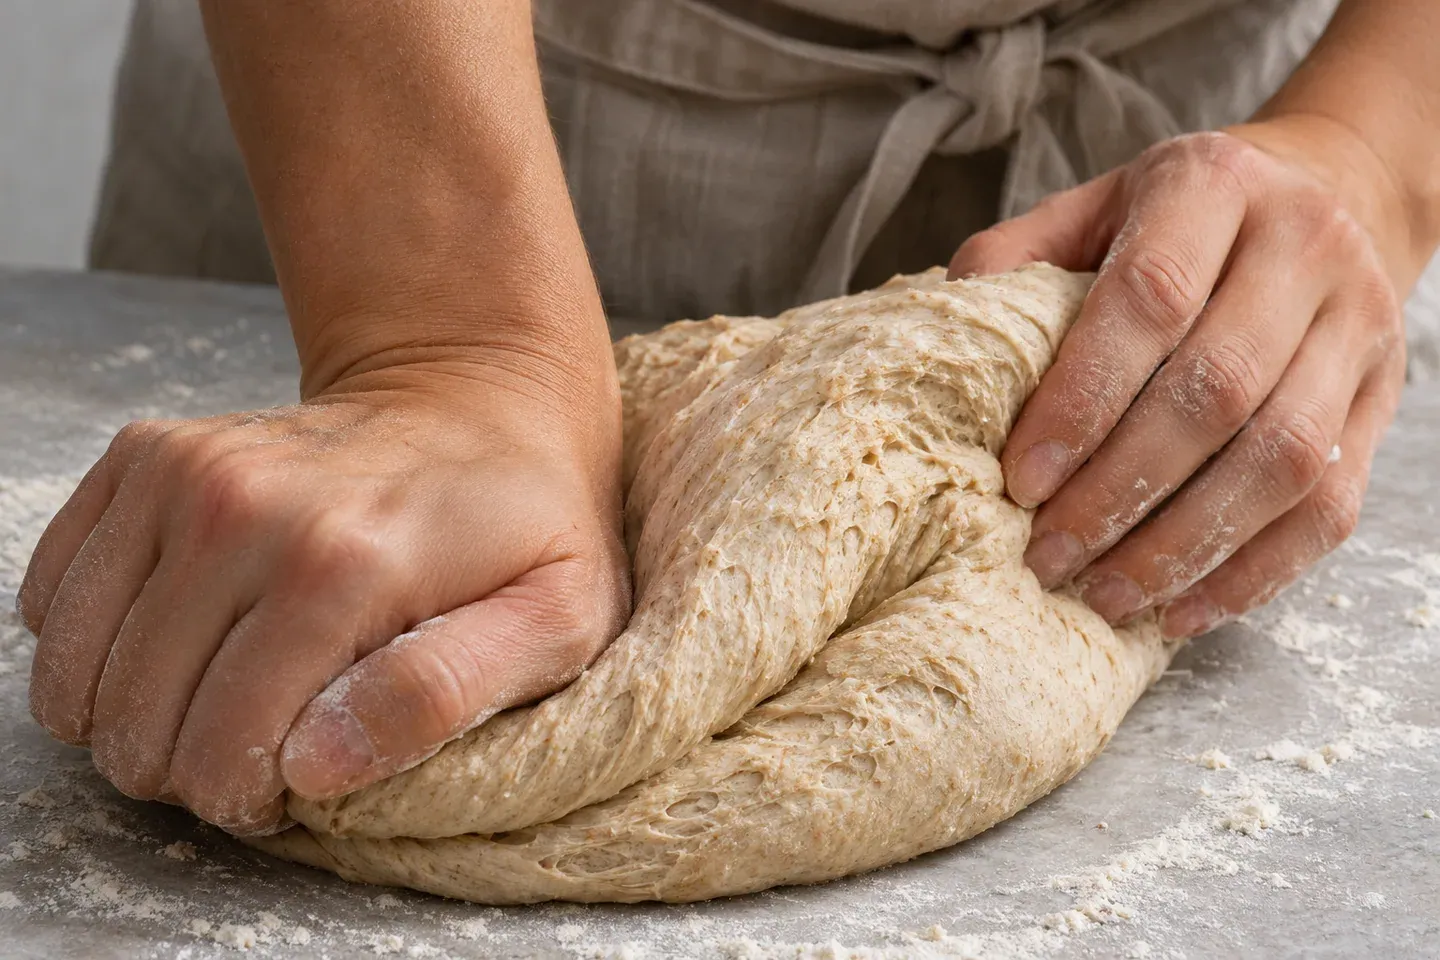
Place the dough in front of you with enough clear counter space to move it forward. Rest the heel of one hand on its near side. Push forward gently, stretching the dough away without pressing so hard that it becomes a thin smear. Your other hand can help steady the part closest to you.
Fold the stretched section back over the dough. Rotate the mass approximately a quarter turn, then repeat. The rotation changes which direction receives the next stretch. After several repetitions, gather any loose edges with the scraper so that you keep working one connected mass instead of scattering fragments across the counter.
Keep your wrists comfortable and your elbows relaxed. Moving your body slightly can provide more controlled pressure than forcing the motion entirely through bent wrists. If the countertop is awkwardly high, use a suitable lower, stable surface rather than compensating with excessive effort.
The rhythm does not have to be fast. A slow stretch that preserves continuity is more useful than a series of sharp pulls that tear the dough. Watch the surface as you work. At first it may look rough and folded; later the folds should blend together more readily and the outside should become more even.
Separate normal tackiness from a handling problem
A slightly tacky dough touches your fingers but releases with limited residue. A much wetter dough may cling and stretch into strings. These are not automatically signs of a mistake, but they do affect which technique will feel practical. A push-and-fold method is often easiest with a moderate-hydration dough.
For example, a formula with 500 grams flour and 325 grams water has 65% hydration before considering other ingredients. A formula with the same flour and 400 grams water has 80% hydration. The second dough may need a bowl-based folding approach even when both formulas are correctly measured.
If an ordinary loaf dough is sticking, pause before reaching for flour. Clean excess dough from your hands with the scraper, cover the mass, and wait several minutes. Hydration and relaxation may improve its handling. Lightly damp hands can help with folding, but repeatedly adding water during kneading also changes the formula.
When a small dusting is necessary, spread it thinly over the work surface. Avoid pouring a mound directly onto the dough. Record significant additions if you want to understand the result later. A dough that absorbed several unmeasured handfuls cannot be compared fairly with the recipe's original hydration.
Let rests do part of the work
You do not have to knead continuously from beginning to end. Several minutes of work followed by a covered rest can be more manageable than a long uninterrupted session. During the pause, the dough relaxes, and the next stretch may meet less resistance.
A rest is especially helpful when the dough springs back sharply each time you push. Elastic resistance is not an instruction to pull harder. Cover it so the outside does not form a skin, then try again. Notice whether it now extends more easily while remaining connected.
Resting is not a substitute for every part of mixing. Dry flour pockets will not reliably disappear if you simply leave a poorly combined mixture alone. Distribute the ingredients thoroughly before relying on time. Similarly, a recipe's long fermentation schedule may already include folding stages that contribute strength, so read the whole method before adding unnecessary extra kneading.
Test development with several clues
Look first at cohesion. The dough should gather as one mass rather than separating into wet and dry fragments. Next notice its surface: ordinary wheat dough generally becomes smoother as it develops, although bran and other additions can interrupt that appearance.
Then check how it stretches. Pinch off a small piece and allow it to relax briefly. Gently widen it between your fingertips. If it forms a thin membrane before tearing, that suggests useful development. Pulling very quickly can tear even a reasonably developed piece, so use a patient, gradual movement.
Do not require complete transparency from every dough. Whole wheat contains bran, and some formulas are not designed for a strong, fine windowpane. A softer dough may also spread more than a firm one while still retaining gas well. Compare the test with the flour and bread style rather than an unrelated photograph.
Finally, notice how the dough holds together when rounded loosely. It should show enough tension to form a coherent shape without splitting at every fold. If the surface cracks and the dough feels unusually hard, investigate dryness. If it slumps into a sticky puddle immediately, consider hydration, insufficient development, and the possibility of an unsuitable technique.
Know when to switch techniques
Very wet dough can be easier to develop inside a bowl. Lift one edge, extend it gently, and fold it across the center, then rotate the bowl and repeat around the dough. Rest between sets according to the recipe. This approach helps you build strength without chasing the dough across a floured counter.
Rich dough can feel slippery or uneven when fat is added. Follow the recipe's order of incorporation. Adding all the butter to a method that expects gradual incorporation can create a different mixing problem from insufficient kneading. Give each addition time to blend before deciding the dough needs extra flour.
Rye-heavy dough should not be judged as if it were an all-wheat sandwich dough. Its handling characteristics and structure differ. Choose a rye-specific method instead of extending hand kneading indefinitely in pursuit of a wheat-style windowpane that the formula is not intended to produce.
Diagnose the result after baking
Underdeveloped dough can struggle to retain gas, but a dense loaf does not prove kneading was the only problem. Inactive yeast, excessive flour, inadequate fermentation, and underbaking can all create disappointing texture. The dense bread guide helps separate those possibilities.
Write down what you observed before the first rise: how the dough stretched, whether you added flour, and whether you used rests. Then record how it expanded and how the crumb looked after cooling. Those notes connect the handling stage with the finished loaf more reliably than a memory that the dough felt vaguely difficult.
On your next attempt, change one variable. You might keep the ingredients identical and add a short rest before the final kneading period. Or you might weigh flour more carefully while using the same kneading rhythm. Changing flour, water, yeast, and technique simultaneously makes it difficult to learn which adjustment helped.
Questions about hand kneading
Is there a minimum kneading time?
There is no single duration that fits every formula. Dough quantity, flour, hydration, resting, and your movements all affect development. Use the recipe's timing as a checking point and judge whether the dough has become cohesive, smoother, and more stretchable.
Can I overknead dough by hand?
Hand kneading is generally slower and less mechanically intense than machine mixing, so beginners more often stop early or add excess flour. Still, more work is not automatically better. If handling deteriorates, pause and consider temperature, hydration, and the dough's stage instead of continuing without a reason.
Must I slap dough against the counter?
No. Slap-and-fold methods are one option for certain doughs, not a requirement for bread making. A controlled push-and-fold rhythm works well for many ordinary loaves. Choose a method that suits the formula and a workspace where you can move safely.
Does kneading replace rising?
No. Kneading develops structure; fermentation produces gas and changes the dough over time. Both matter, but they have different jobs. Once the dough has appropriate strength, move on to the recipe's first-rise stage and observe its expansion rather than kneading until it becomes airy.