
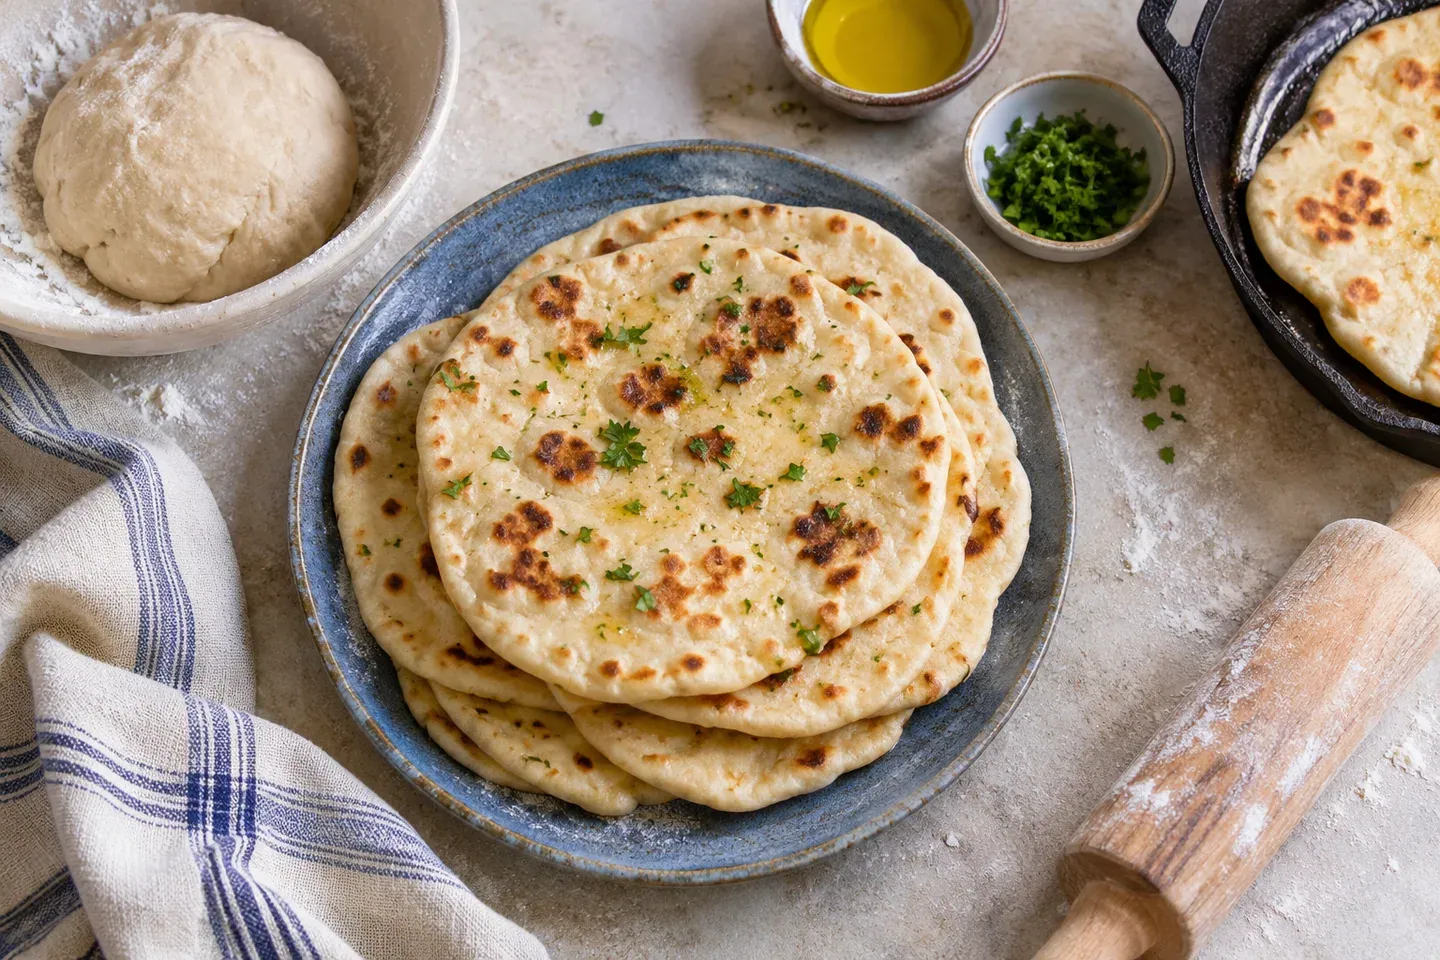
A homemade flatbread recipe without yeast can be a useful first bread project because there is no fermentation schedule to manage. Mix a simple dough, let it relax, roll it thinly, and cook each piece in a skillet. The main decisions concern dough consistency, thickness, and pan heat rather than how far a loaf has risen.
This draft makes six plain, unleavened skillet flatbreads. They are designed as flexible accompaniments for a meal, not as guaranteed pocket pitas or thick, fluffy naan. The quantities and times require recipe validation, and Easy Bread Baking does not claim to have tested this formula.
Choose the kind of flatbread before mixing
Flatbread is a broad description rather than one precise texture. A thin unleavened bread, a yeast-raised pita, and a yogurt-enriched skillet bread use different formulas and methods. This recipe aims for small, thin rounds that can bend after cooking and covering.
Expect some modest bubbling in the skillet as trapped moisture heats. Do not expect every round to inflate into a complete pocket. Adding more heat in pursuit of a balloon can scorch a bread whose formula and rolling were not designed for that result.
Keep the first batch plain so that you can recognize its normal consistency. Chopped herbs, coarse seeds, cheese, or large amounts of garlic change rolling and can burn against the hot pan. Once the basic method is familiar, use a purpose-designed variation rather than adding ingredients without accounting for their effects.
Ingredients for six rounds
Use 250 grams all-purpose wheat flour, 150 grams water, 15 grams olive oil or neutral oil, and 5 grams fine salt. No yeast or baking powder is included. The water equals 60% of the flour weight, with oil contributing handling and tenderness rather than acting as additional water.
Approximate US equivalents are about 2 cups plus 1 tablespoon flour at 120 grams per cup, about ½ cup plus 2 tablespoons water, 1 tablespoon oil, and about ¾ to ⅞ teaspoon fine table salt. These are approximate conversions. Weigh the flour and salt if possible, especially when using a different cup convention or salt crystal size.
The total dough weighs about 420 grams, giving six portions of approximately 70 grams. You can divide by sight, but weighing helps the pieces cook at a similar rate. A very small round and a much thicker large round will not follow the same skillet timing.
You need a bowl, scraper, rolling pin, stable work surface, and a suitable skillet. Have a clean towel or covered plate ready for the cooked breads. Check the skillet's care and heat instructions, especially for nonstick cookware, rather than assuming every pan tolerates prolonged dry heating.
Mix until the dough is uniform
Stir the salt into the flour, add the water and oil, and mix until the dry flour is incorporated. Scrape the bottom of the bowl and press the pieces together. Initially the dough may look rough, but it should become one connected mass rather than leaving dry crumbs behind.
Knead briefly until more even. This is not a project that requires a long, forceful kneading session. You need enough cohesion to roll the dough without large cracks, followed by resting so it stretches more comfortably.
If the mixture will not join, work in water a teaspoon at a time. If it is soft and slightly tacky, do not immediately cover it with flour. Letting it rest may make it easier to handle. A large unmeasured flour addition changes the balance and can produce stiff flatbreads.
Cover the dough and let it rest about twenty minutes. Protect the surface from drying. A skin can form cracks during rolling and interfere with an even round. The rest is for hydration and relaxation, not for a yeast-driven increase in volume.
Portion and rest before rolling
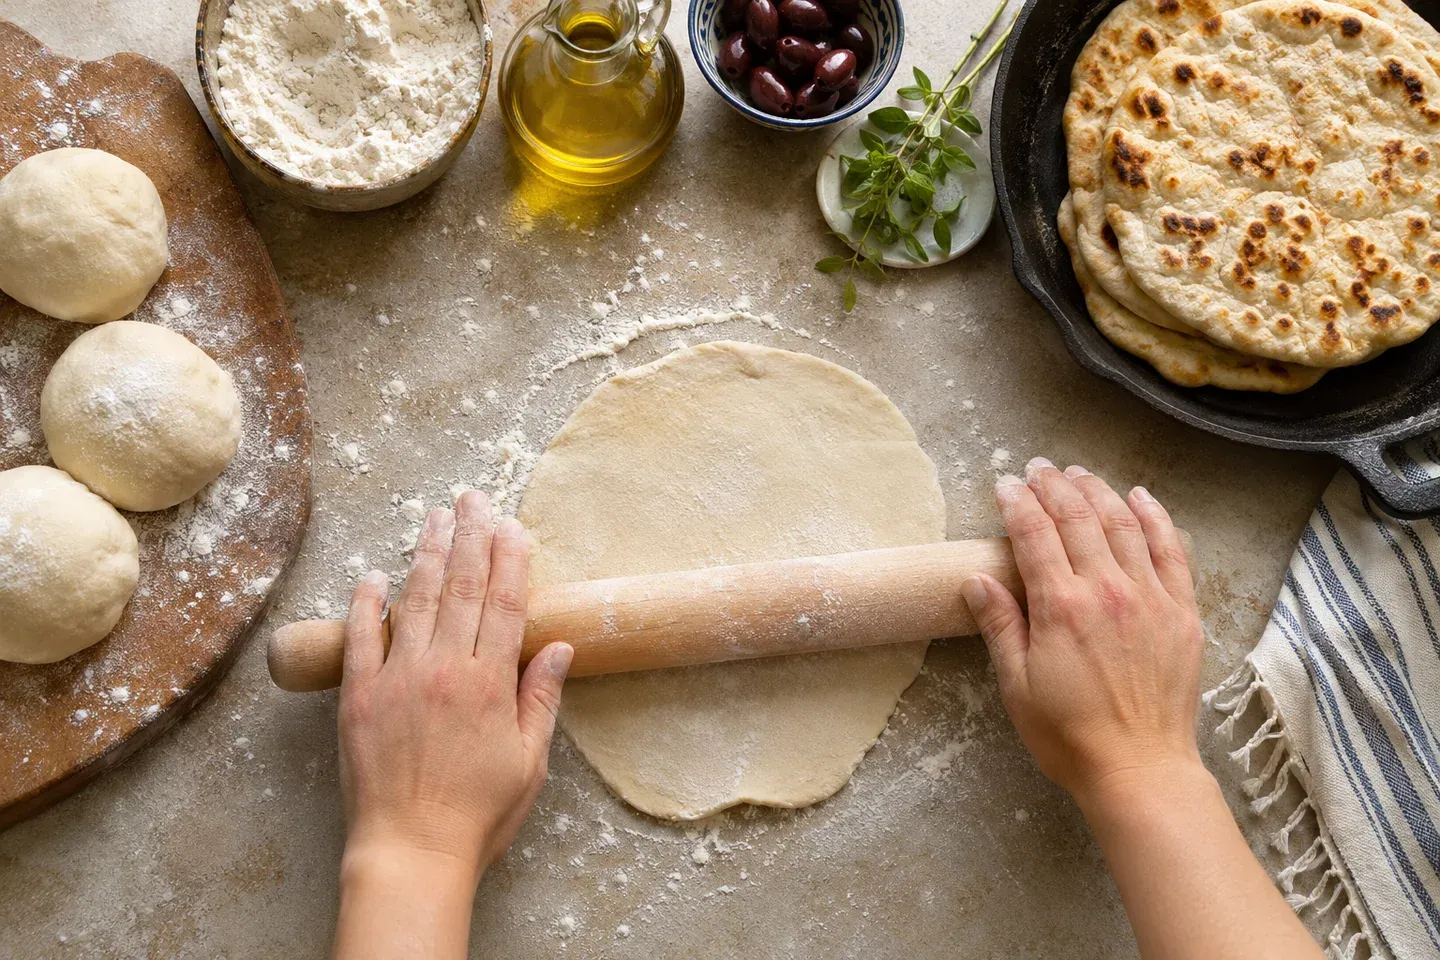
Divide into six approximately equal pieces. Round each gently by bringing the edges toward the center, then set the seam underneath. Keep the pieces covered while you work so that the last one is not drier than the first.
If a portion resists the rolling pin sharply, give it a few additional minutes to relax. Forcing a tense dough often produces a thick center and very thin edges because the round keeps retracting. That unevenness makes pan timing harder to judge.
Roll one or two pieces ahead rather than stacking all six uncovered. A light dusting can prevent sticking, but brush off loose excess before cooking. Flour sitting in the skillet can scorch and create bitter dark marks that do not accurately show how well the bread itself has cooked.
Roll for consistent thickness
Aim for a round roughly 7–8 inches across, thin enough to bend but not so thin that it tears during transfer. The exact diameter matters less than consistency across the surface. Turn the dough between passes and check whether it sticks underneath.
Use the rolling pin from the center toward the edges with controlled pressure. Avoid repeatedly crushing one rim while leaving a thick central lump. If the shape becomes oval, that is acceptable for a home bread; even thickness is more useful than a perfect circle.
Lift the round before transferring it so that you know it releases cleanly from the counter. A scraper can help without stretching a weak edge. Do not flour the top heavily just to hide sticking underneath. The flour-measuring guide explains why counter additions still change the finished dough.
Set the skillet heat by its effect
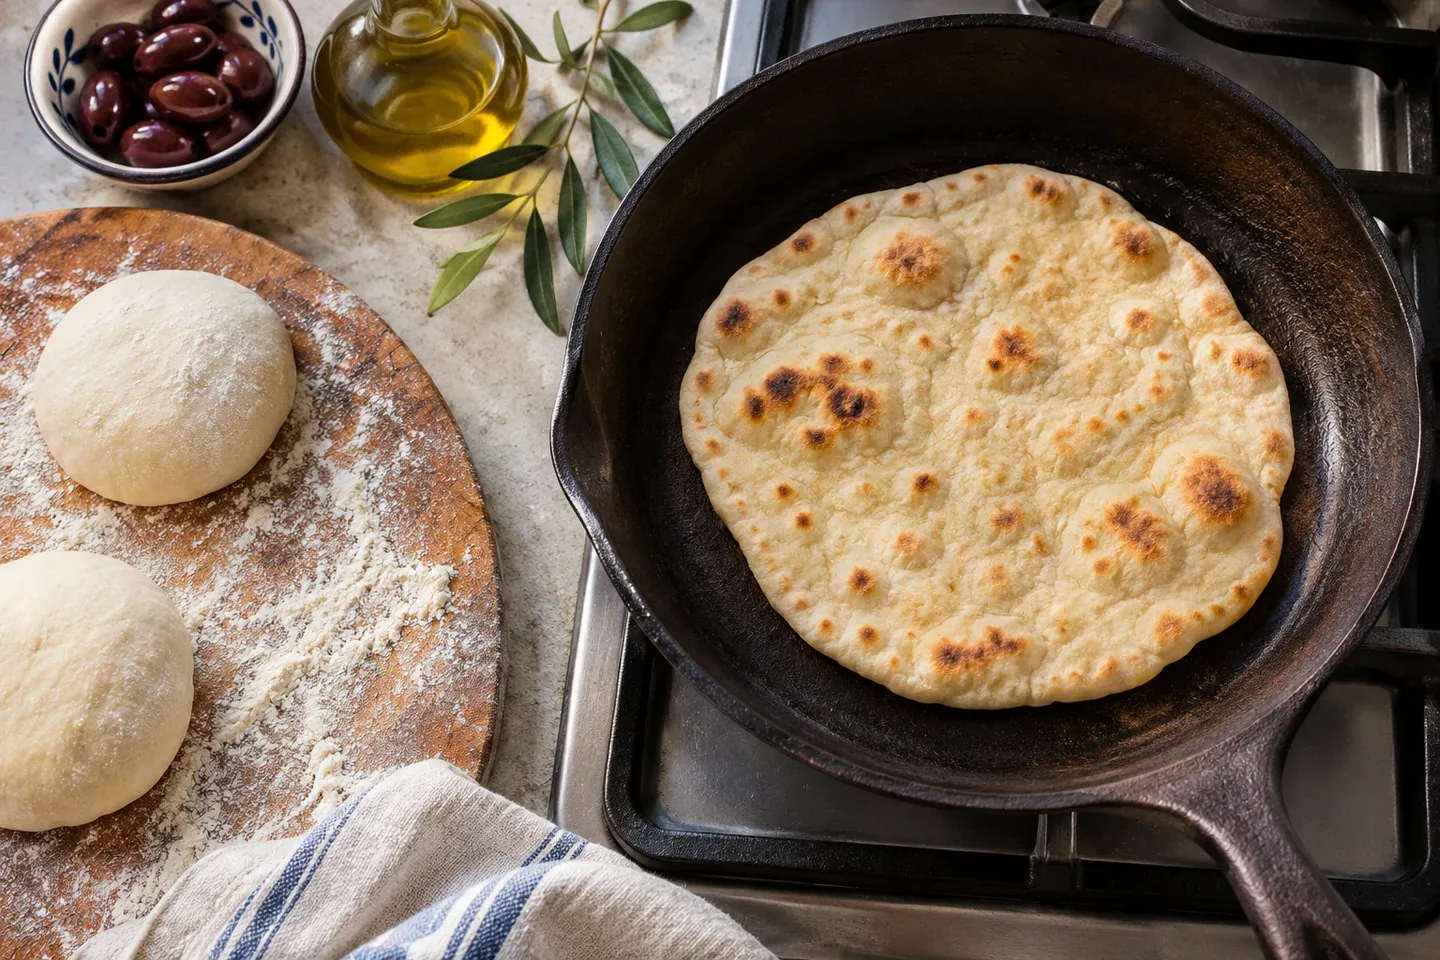
Preheat a suitable skillet over moderate to moderately high heat, following its instructions. The goal is enough heat to cook the thin dough promptly and develop scattered brown spots without burning loose flour or leaving a black exterior around a raw center.
Lay the first round into the pan carefully. Look for small bubbles and a surface that begins to lose its raw appearance. After roughly one to two minutes, check the underside. Turn when it shows some browned areas and the dough has enough structure to lift comfortably.
Cook the second side for roughly another minute, adjusting to thickness and heat. These are draft working estimates, not exact instructions for every stove. A heavy pan retains heat differently from a thin one, and later rounds may cook faster after the pan has fully heated.
Use the first bread as a check. If it blackens almost immediately, lower the heat and remove scorched loose flour safely before continuing. If it stays pale while becoming rigid and dry, investigate whether the pan is too cool and the cooking time unnecessarily long.
Do not leave the skillet unattended while rolling another round. Work at a pace that lets you observe both dough and pan. Having a second piece ready can help, but a pile of unfinished preparation is not worth a burnt first batch.
Keep cooked breads flexible
Place each cooked bread on a clean towel or covered plate. Cover lightly so that it does not immediately lose all its moisture while the next round cooks. This can soften the surface, but it does not reverse a severely overcooked, brittle bread.
If you prefer a slightly crisp finish, serve promptly rather than trapping the breads in a tight stack. Decide which texture suits the meal. Flexibility for folding and crispness for scooping are different goals, so one storage step will not maximize both simultaneously.
Allow leftovers to cool before sealing them in food-safe packaging. Freeze portions you will not use soon. Reheat briefly in a suitable skillet or another appropriate appliance, watching for drying rather than assuming that more heat always restores freshness.
Solve common first-batch problems
Flatbreads that tear during rolling may be too dry, insufficiently rested, or rolled extremely thin. Check the measurements and cover the portions between turns. A small water adjustment needs to be mixed in thoroughly rather than rubbed onto one torn patch.
A thick, chewy center with dark edges points toward uneven rolling or excessive heat. Change thickness and heat deliberately on the next round. Simply leaving it in the pan longer can make the edges worse while the center remains unpleasant.
Bread that becomes rigid after cooling may have lost too much moisture during cooking or uncovered waiting. Review pan temperature, cooking duration, and how the batch was covered. Our bread storage guide helps distinguish drying from other changes in texture.
Recipe card
Yield: 6 flatbreads, about 70 grams dough each. Difficulty: Beginner. Active preparation: About 15–20 minutes. Resting: About 20 minutes, plus brief additional relaxation if needed. Cooking: Roughly 2–3 minutes per bread, or 12–18 minutes sequentially. Total: About 45–60 minutes with preparation overlapping sensibly.
Ingredients: 250 g all-purpose wheat flour; 150 g water; 15 g olive or neutral oil; 5 g fine salt. Yeast: None. Chemical leavener: None. Approximate US measures are given in the ingredient section.
Estimated schedule: 20 minutes active preparation; 15 minutes cooking; 55 minutes total, including resting, rising, and cooling where applicable. These approximate planning figures sit within the ranges above; dough and doneness cues take priority.
- Mix flour and salt, add water and oil, and combine fully. Knead briefly into a more uniform dough.
- Cover for about 20 minutes. Divide into six equal portions, round gently, and keep covered.
- Roll each portion to a thin, even round about 7–8 inches across, using minimal dusting flour.
- Cook in a suitably preheated skillet until the first side sets and develops brown spots, then turn and finish the other side. Adjust heat based on the first round.
- Cover cooked breads lightly for flexibility and serve. Cool leftovers before packaging; freeze portions for later use.
Baking tip: Even thickness matters more than perfect circles. Storage: Avoid prolonged uncovered waiting and repeated reheating. Status: Editorial draft requiring recipe validation; no testing or nutrition claims.
Questions about this no-yeast method
Can I leave the dough overnight?
This draft method is designed around a short covered rest, not an overnight fermentation. A long change to the schedule needs appropriate storage and a suitable recipe. Do not leave dough for many extra hours simply because another bread uses a long rise.
Can I use whole wheat flour?
Whole wheat changes absorption and rolling behavior. This draft does not provide a validated full substitution. Start with a recipe designed for whole wheat flatbread if that is your goal, rather than expecting the same water quantity to work identically.
Is raw flour safe once it looks mixed?
No. Do not taste the uncooked dough. Mixing does not make flour ready to eat; follow FDA flour-handling guidance and cook the bread appropriately.