
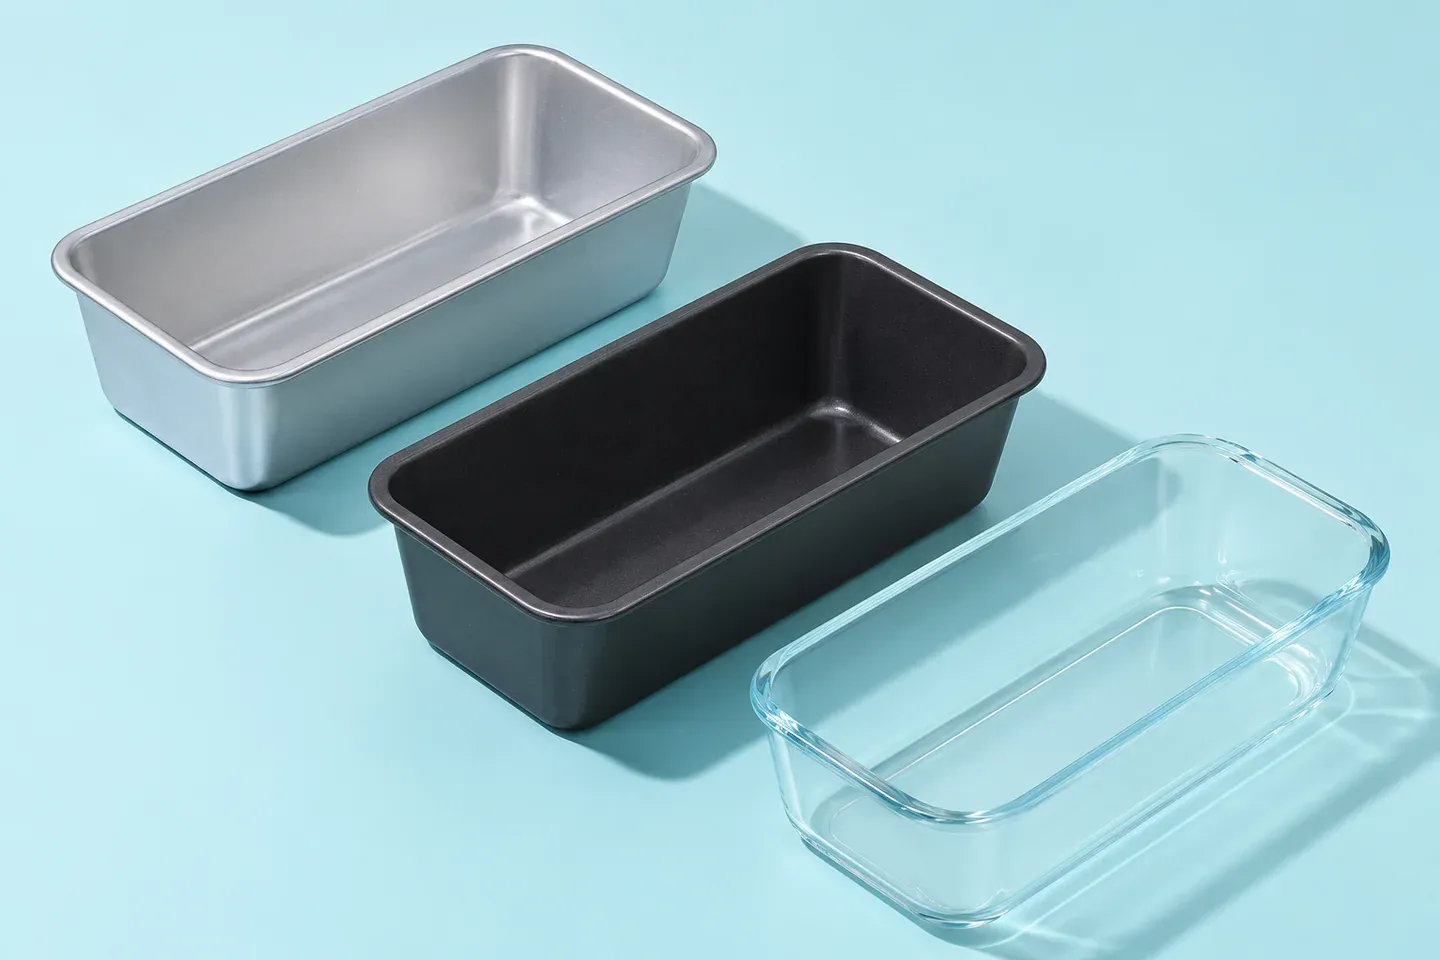
The best bread pans for home baking are the ones that match the recipes you actually make, fit your oven, and are comfortable to handle. For a beginner repeating a standard wheat pan loaf, a straightforward light-colored metal loaf pan in the recipe's specified size is a practical starting choice. More expensive materials or special shapes are not automatically an upgrade.
This is a selection guide, not a ranked product review. It does not claim hands-on testing of named pans or invent performance scores. The aim is to help you compare dimensions, construction, release, and care before spending money on equipment that may not suit your dough.
Start with a recipe, not a product photograph
Read the pan size in the bread recipe you intend to repeat. Notice whether the dimensions describe a standard loaf pan, a covered Pullman-style pan, several mini pans, or another shape. Those are not interchangeable containers simply because each can hold dough.
The dough quantity and pan dimensions work together. A small dough in a large pan may look low even with appropriate fermentation, while too much dough can crowd a smaller pan. Buying a taller-looking pan does not fix every low loaf if the formula remains mismatched.
If you already own a pan close to the required size, measure it before replacing it. A marketing name may not describe the exact internal dimensions. Learning the equipment you have can be more useful than beginning with several unfamiliar pans at once.
Measure the dimensions that affect the loaf
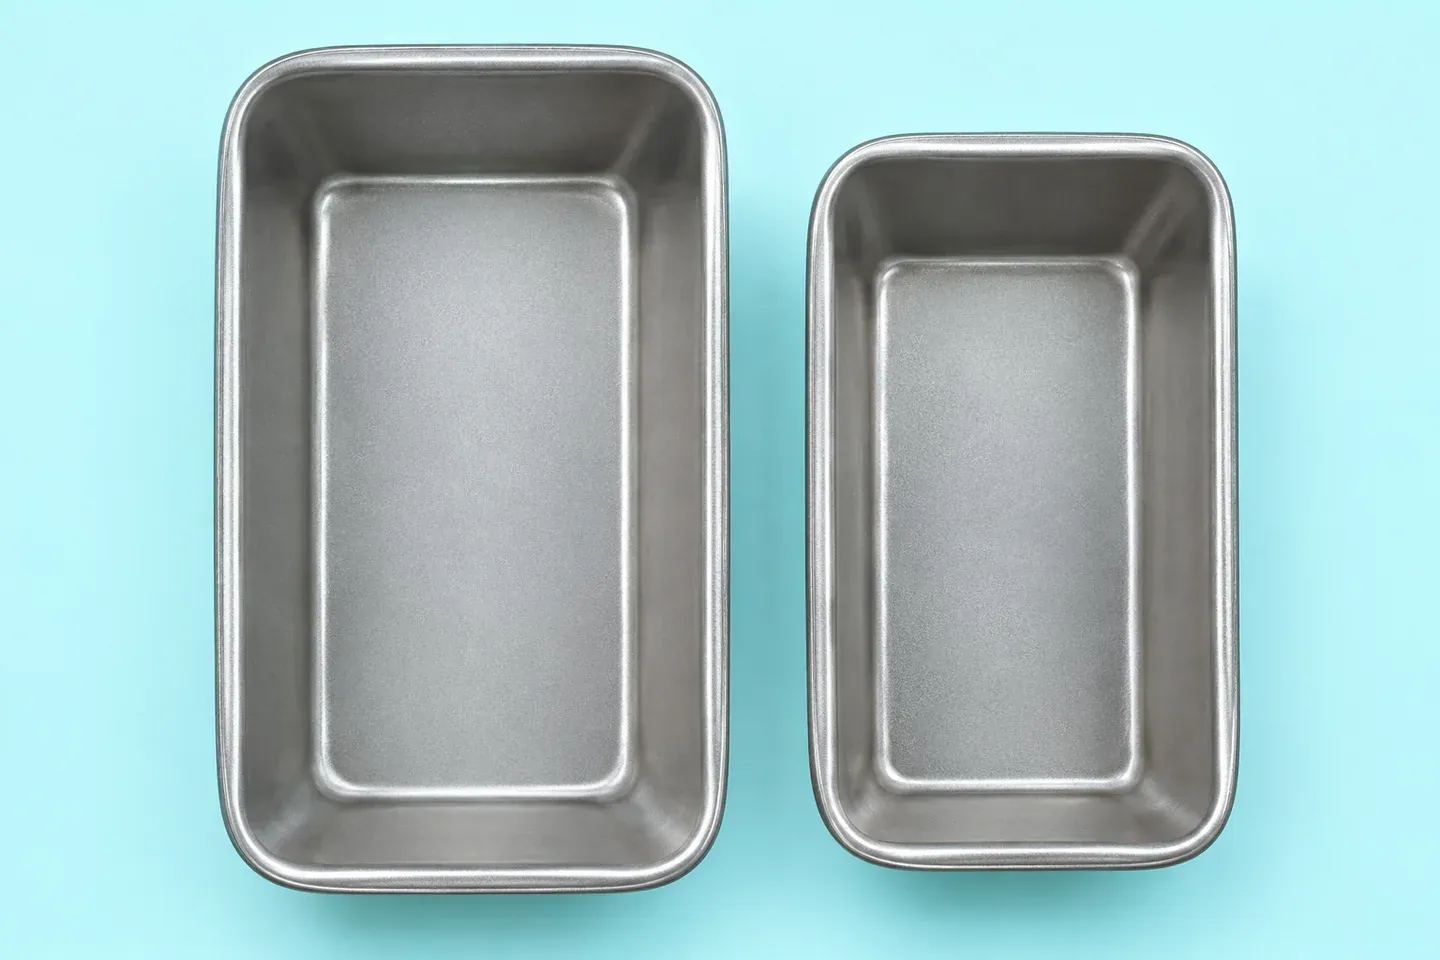
Common household loaf pans include approximately 8½ by 4½ inches and 9 by 5 inches at the top. Their approximate metric equivalents are 21.6 by 11.4 centimeters and 22.9 by 12.7 centimeters. Depth, taper, and corner shape still matter, so those two top measurements do not fully describe capacity.
Use the manufacturer's stated measuring convention where available. A pan's outside rim can differ from its usable internal space. A wide flange or handle may also increase the overall oven footprint without providing more room for dough.
For a simplified comparison, an 8½-by-4½-inch rectangle has a top footprint of 38.25 square inches, while a 9-by-5-inch rectangle has 45. That is a meaningful difference, but it is not a calculation of actual pan volume because real sides taper and depths vary.
This explains why substituting one size for another can change loaf height. It does not provide a universal scaling rule for every recipe. Use a recipe's own pan-substitution guidance or calculate a deliberate test rather than assuming that a small difference in the name is insignificant.
Compare materials by useful trade-offs
| Material or construction | Useful characteristic | What to check |
|---|---|---|
| Light-colored metal | A straightforward reference for many pan-loaf recipes | Dimensions, rigidity, and the recipe's intended setup |
| Dark or coated metal | Can provide convenient release in a suitable product | Browning behavior, coating care, and temperature limits |
| Glass | Lets you see parts of the loaf through the sides | The specific product's oven, handling, and thermal-shock instructions |
| Ceramic | Can offer a substantial, attractive baking vessel | Weight, dimensions, heating behavior, and care requirements |
| Flexible silicone | Can make release convenient in some designs | Whether a supporting tray is required and how the pan holds its shape |
No row is a universal winner. A pan should be selected as part of a recipe-and-oven setup. The same loaf can require different observation when transferred to another material, especially if its dimensions also change.
Why simple metal is a useful starting point
A rigid, light-colored metal pan makes a practical baseline for learning ordinary wheat loaves. Its shape is easy to handle, and many household bread recipes specify a similar vessel. Starting with the intended type reduces the number of variables in your first attempts.
Check that the pan does not twist excessively when lifted and that seams or corners are appropriate for its intended use. The rim should give you a secure place to handle the pan with oven mitts. Thin, awkward construction can matter more in daily use than a decorative finish.
Dark surfaces can change browning compared with a pale reference pan. Do not automatically lower the oven by a fixed amount for every dark pan; follow the product and recipe guidance, then observe the loaf. A global adjustment without checking the actual result can create a different problem in the center.
The baking-temperature guide explains why top color, side structure, and the cooled crumb should be considered together. Pan selection and oven settings are linked, but neither should be changed randomly in response to one disappointing loaf.
When glass or ceramic makes sense
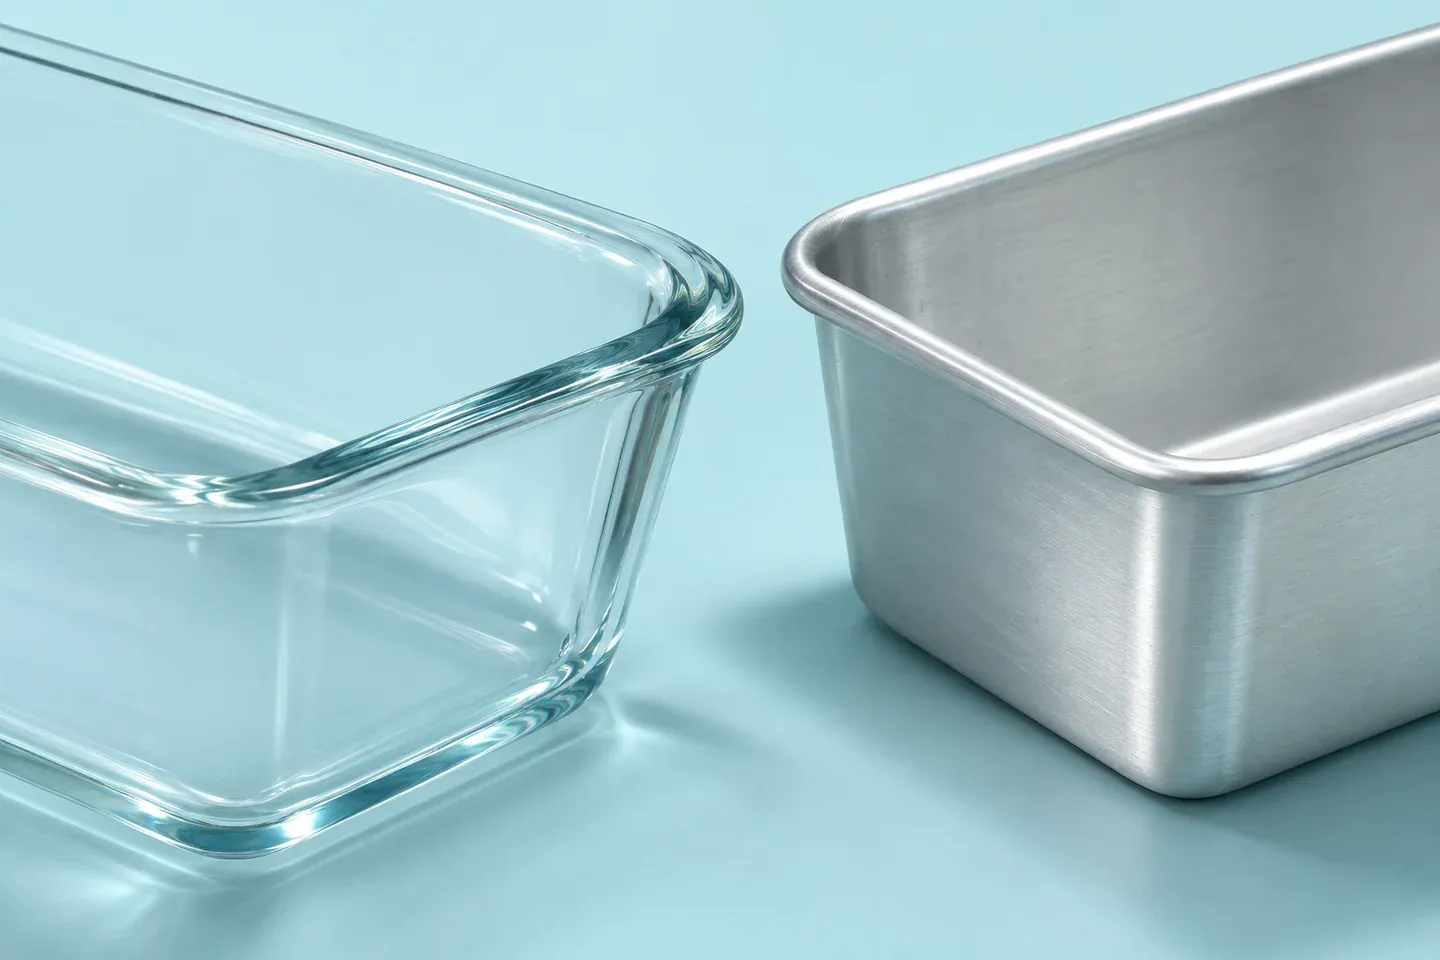
An existing oven-safe glass or ceramic pan may suit a recipe developed for it. The important step is to read its instructions rather than treating all transparent or glazed cookware as equivalent. Product design, allowable use, and handling limits can vary.
Pyrex's manufacturer FAQ specifically connects use of its glass bakeware with a fully preheated oven and its safety and usage instructions. That is a product-specific reference, not permission to use every glass container at any bread-baking temperature.
Avoid sudden temperature changes that the product does not support. A hot vessel and a cold or wet surface can be a different risk from ordinary oven baking. Do not improvise stovetop use or a steam setup merely because a pan is safe for some oven recipes.
Weight also matters. A substantial ceramic loaf pan plus dough can be awkward to lift from a deep oven. Choose something you can handle securely with the mitts and rack placement you use, and check where it will rest after baking.
Decide whether a coating helps your routine
A suitable nonstick surface can make release easier, but it does not remove the need to follow preparation and care instructions. Some recipes still call for greasing or lining. Use the method appropriate to the particular pan instead of assuming every coating requires identical treatment.
Check permitted utensils, cleaning methods, and temperature limits. Avoid scraping the interior aggressively with sharp tools to release a stuck loaf. If a coating is damaged, follow the manufacturer's advice about continued use or replacement rather than making unsupported health claims either way.
Uncoated pans also need appropriate preparation. Learning how a particular loaf releases after baking can be part of your routine. A pan that releases well with one enriched dough may behave differently with a sticky inclusion-heavy loaf.
Do not judge a coating from a star rating presented without context. Recipe type, preparation, age, and handling can affect another person's report. This guide does not turn those reviews into invented testing evidence for the publication.
Match special shapes to an actual purpose
A lidded Pullman-style pan is designed for a particular enclosed loaf shape and needs an appropriate dough quantity and method. Do not add a lid to an arbitrary rising dough and assume the pressure and space will work out. Follow a recipe suited to the pan.
Mini pans change portion size and baking behavior. Dividing one loaf among several smaller containers may shorten the required bake, but the amount and timing should be evaluated deliberately. A full-size loaf's schedule cannot simply be copied without observation.
Very wide or decorative pans can be attractive for serving, but they may produce slices that do not suit your main use. If your goal is ordinary sandwich bread, consider slice shape and toaster fit before choosing an unusual outline.
Buy for repeatable use
Check oven clearance, including rims and handles, and consider whether you normally bake one loaf or several. Two pans should fit with the circulation space the appliance and recipe require. A set is not useful if its pieces cannot be arranged appropriately in your oven.
Choose a size you can repeat with a familiar recipe. Our white bread draft and whole wheat draft use different pan sizes deliberately. Their dough quantities illustrate why the vessel belongs to the formula rather than serving as an interchangeable decoration.
If you already have a reliable pan, record its dimensions and material in your baking notes. That information makes later recipe troubleshooting much clearer. A replacement with a similar name may still behave differently if its usable shape or construction changes.
Care for the pan after baking
Follow the manufacturer's cooling and washing instructions. Allow appropriate cooling before cleaning, use permitted utensils, and dry the pan as directed. Do not apply universal rules about dishwasher use, soaking, abrasives, or oiling across every material.
Check corners, seams, and lids for trapped residue. A clean, dry storage space helps you notice damage and prevents the next loaf from beginning in a pan that still contains old debris. Routine care should support repeatable baking rather than become a complicated ritual unsupported by the product's guidance.
Pan questions
Do I need an expensive pan for my first loaf?
Not necessarily. A sound pan that matches the recipe and is safe for its intended use is a more important starting point than a premium label. Spend according to your baking needs rather than an unverified promise of a universally taller loaf.
Can I use the pan I already own?
Check dimensions, material, condition, and manufacturer instructions against the recipe. A suitable existing pan may be entirely practical. If it differs substantially, use a recipe developed for it or plan a controlled adaptation rather than forcing the original schedule.
What should I choose first?
Choose the pan specified by the bread you want to repeat most often. That gives you a clear baseline for learning dough development, proofing, and baking before changing equipment. A small dependable routine is more valuable than several pans whose behavior you have not yet learned.